
Import a CSV Statement the Simple Way
Overview
Most banks, credit cards, and other account providers offer statements in a few formats like OFX, QBO, and a spreadsheet format called CSV, which stands for Comma Separated Values.
I recommend using the OFX or QBO option if you can because it's a standardized format that will import into QuickConverter consistently. But if that isn't an option for whatever reason, then CSV is the next best option.
A CSV file is a text document with values separated by commas, also known as the delimiter.
A CSV containing text that looks like this:
Is displayed like this in a spreadsheet app:
The big issue is that it seems like there is an endless number of formats banks provide statements. They can give headers a myriad of names and in different orders. They can generate dates and numbers in a wide variety of formats as well. Personally, I love figuring this stuff out, and that's why I created this app.
I want to give you a overview of how to simply import bank statements in CSV format into QuickConverter the simple way.
Auto Detection
For this simple method to work, all you need to do is:
- Open your CSV up in Excel or your spreadsheet app of choice.
- Change column headers to the correct names below.
- Optional: Delete the extra columns and rows above
QuickConverter auto detects for the following column headers:
- Date
- Description
- Amount header or Credit & Debit headers
- Check Number (optional)
- Memo (optional)
More smart features:
QuickConverter will also auto detect the cell delimiter your file is using. For example, some files are use Tab as a separator while others use pipe "|".
When you import the file into QuickConverter, it will just automatically populate the Editor with your data, and that's all.
QuickConverter can handle absolutely massive documents. I tested it with spreadsheets over 19,000 rows on a 2015 MacBook running Windows... And it's completely usable. I
Caveats
-
QuickConverter requires a minimum of Date, Description, and Amount or Credit/Debit columns present to work correctly. Pretty simple, right?
-
If your statement has an amount column that is all positive, and another column that indicates if it's a credit or debit, then you'll need to add a little Excel formula to create a new amount column with positive and negative numbers. Separating the amounts into two columns, credit and debit also will work.
For example if your bank gives you a CSV in this format:
Here's an example formula to create a new Amount column for importing into QuickConverter:
=IF(C2="credit",D2,-1*D2)
All it does is look at if the cell, C2, contains the text "credit". If it does, then use the amount, otherwise multiply it by -1 to make it negative. Paste and spread the formula down the new column to create a column of positive and negative amounts.
You might need to modify the formula for your own situation.
How to convert all positive amount column in 3 steps.
Here are some screen shots from Excel, but it also works the same with Google Sheets and other spreadsheet apps.
- Example formula:
=IF(C2="credit",D2,-1*D2)
Just change the cell references, in this case C2 and D2, to match your spreadsheet. Then copy it down for all rows.

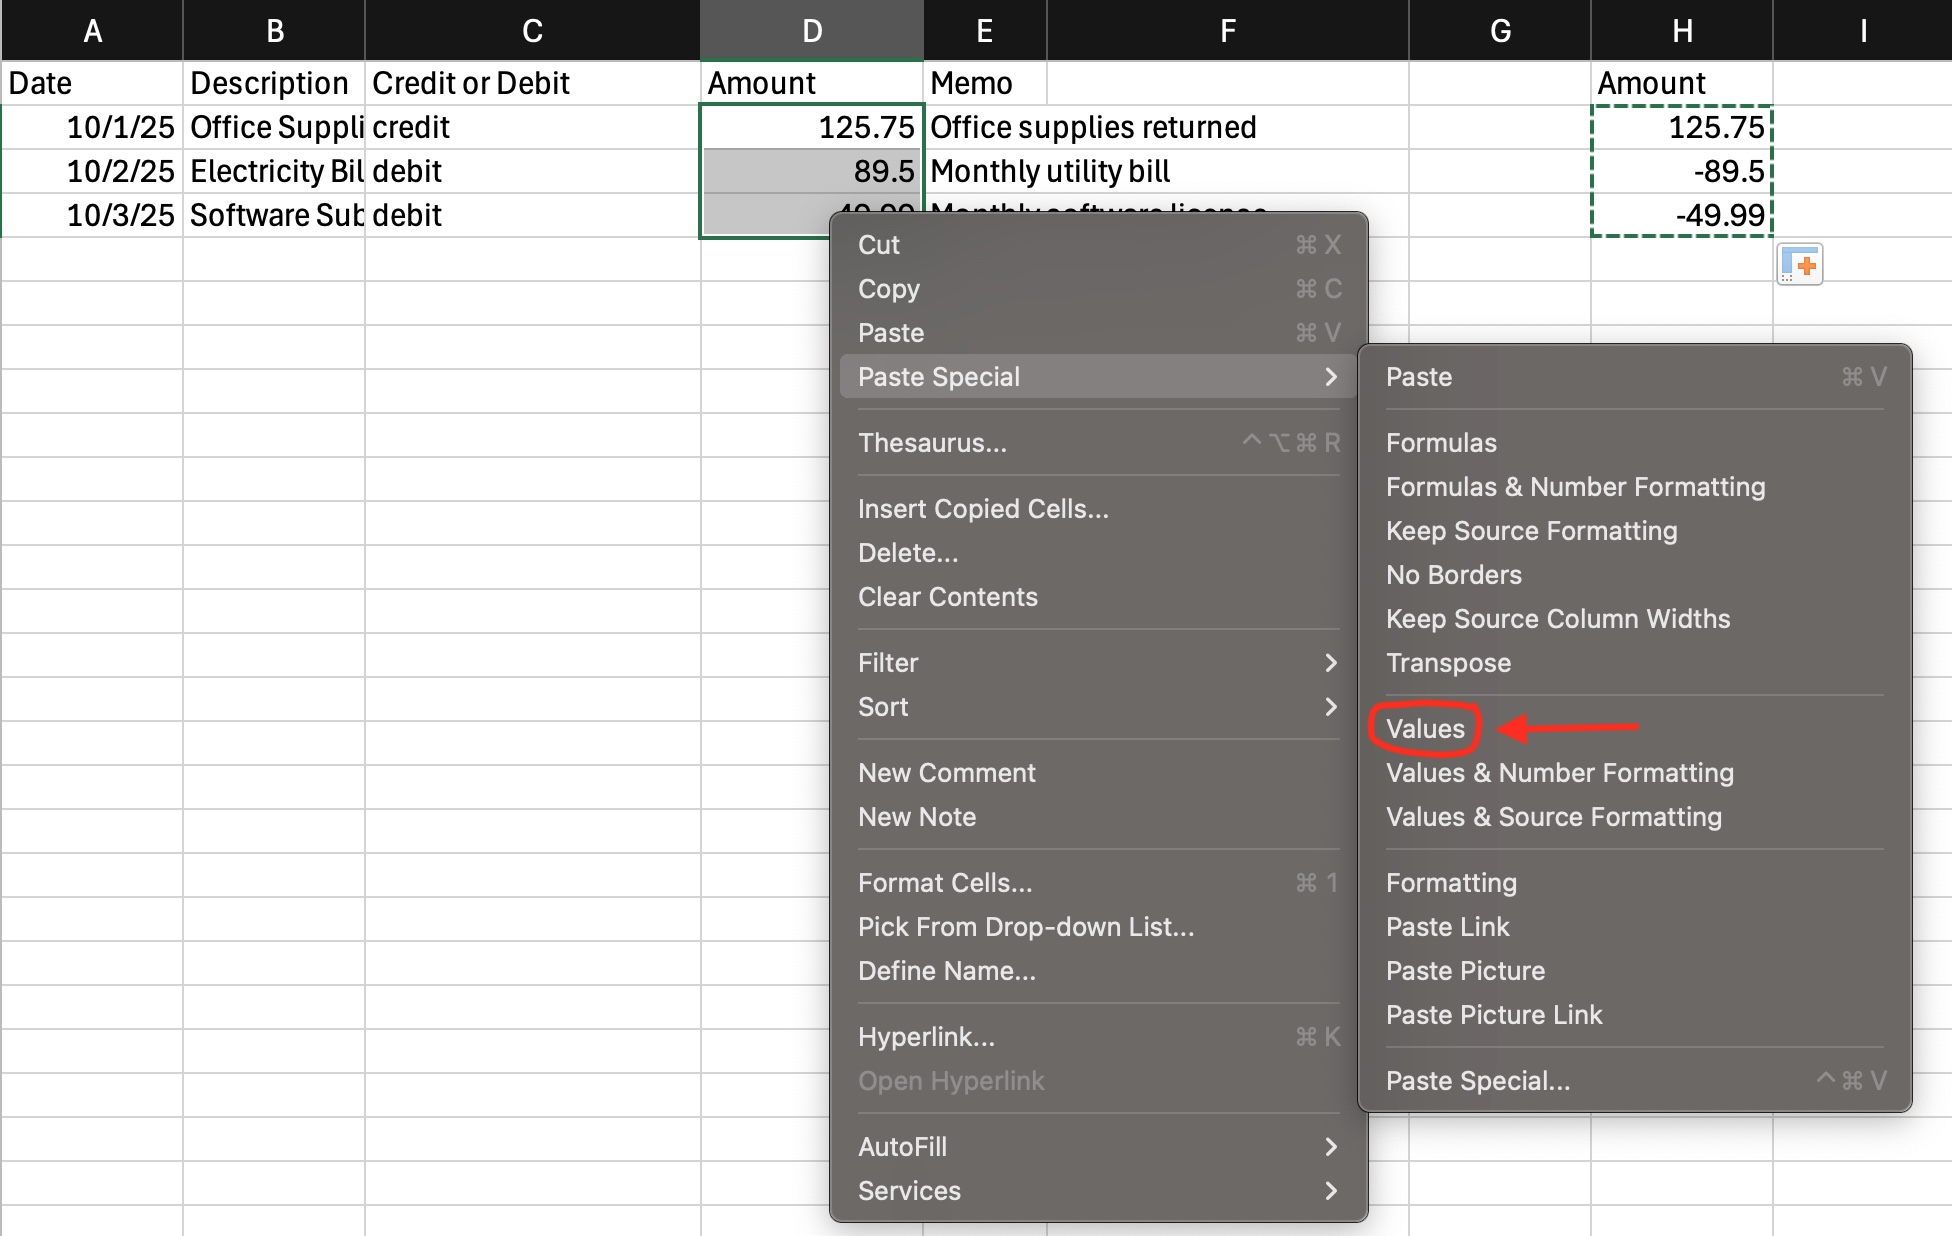
- Copy the new amounts. Then, right click on first value of the old amount column.
Select
Paste Special > Valuesto write the new values as plain numbers.
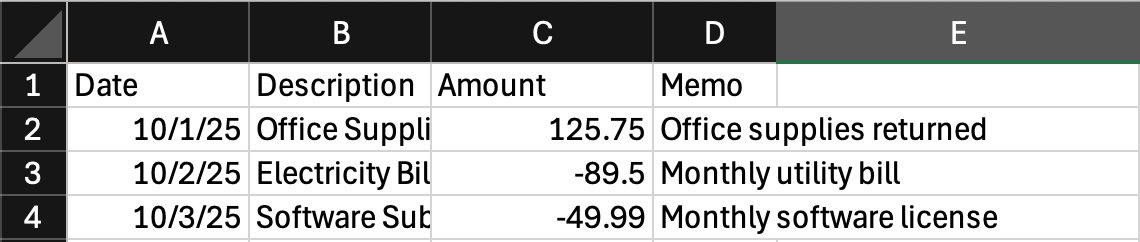
- Remove all the extra columns, and save your work.
Advanced options
There are many advanced options to help you import your file without having to modify the original file, like selecting a header row, assigning columns to fields, direct fill, and even columns to splits, and you I go over all of that in a video in this post.